
For some types of painting and image manipulation it is convenient to use multiple layers of images rather than a single image. For example you may want to overlay text or drawings over a photograph and then be able to move or edit each layer independently.
To create a new layer, you can use the Layers window ('L' key or View menu), or the Layers menu. Same as with new image, new layer can be created either empty or from a screenshot, or from clipboard. You can then edit, manipulate, load to, or save this new layer just like any other image.
The background layer, the one that sits below all other layers, has some special properties. Its size determines the size of the final composite image, and its transparent colour, if any, is used for colour transparency in the composite image. If the background has alpha transparency, then the composite image will have alpha transparency as well.
Otherwise, all layers are created equal - you can make any other layer the background, or turn background into a normal layer, by rearranging layers (raising or lowering).
If you have several images that you want to open as layers, it is possible to do this using a file manager and its drag 'n' drop facility. Simply select all of the image files you want using your favourite file manager (e.g. Rox, Konqueror, Nautilus), and then drag them over the main mtPaint window and release the mouse button. mtPaint will then load each of the files as a new layer.
You can move any layer around by clicking and dragging it in the the view window, or by pressing CTRL and using the arrow keys (+SHIFT nudges like pasting). Or you can use coordinate spins in the layers window. There is also a button on the layers window which puts the layer back to the centre of the background image.
The layers window allows you to name each layer for convenience and to temporarily hide it by unchecking the toggle button to the right of the layers name. It also allows you to duplicate, delete, raise or lower layers, and change their opacity.
When you decide you want to save this composite image you use the Layers menu. Alternately, you can put the composite image into a new layer. If you want to save information relating to the layers you will need to use the option 'Layers->Save As' which saves a small text file containing information about each layer.
You can then load these layers back into mtPaint by loading the text file. Please note that when you save the composite image or the text file you are not saving each individual layer. As mentioned earlier, each layer is considered to be its own file and must be saved with the 'File' menu or Ctrl-S as normal. The benefit of treating the layers separately is as follows:
After saving the layers text file you must not move it anywhere else unless you also move the image files with it as these file references are relative. The simplest method is to keep all original images and text files in a single directory.
When using layers, the undo memory limit set in the preferences window must be divided by the number of layers to determine the limit per layer. For example, with a 32MB limit and 4 layers there is an 8MB limit per layer for the undo. This is because in mtPaint, undo for each layer works independently; you can undo and redo actions on one layer even if simultaneously editing another.
When using many layers, undo memory gets split into uncomfortably small chunks. Some layers may use only a small part of their undo space allotment, while others are getting cramped. To alleviate this problem, mtPaint uses so called "communal undo space". It is a share of undo memory which is available to all layers, with the current layer having priority. By default it takes 25% of total undo space. This way, however many layers you have, the layer you're working with can use more than 25% of undo memory.
Still, "communal undo space" is a compromise solution, and imperfect like all compromises. If the current layer needs more of "communal space" than remains unused by other layers, then some other layer's undo frames will have to be freed to get that space (the oldest undo frames of the most "greedy" layers are freed first). So, when using communal space, per-layer undo is not absolutely independent anymore. Usually this is not a problem, but if it is, you can reduce the communal space to 0 in the preferences window. Alternately, you can increase it, to allow the current layer use more of undo space.
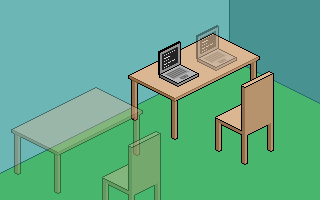
Here are some examples of composite images created by using the layer facilities. Click on each image to download the source files:
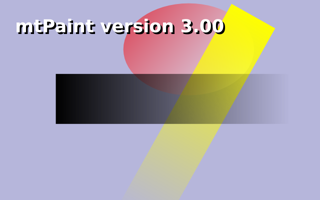
If you combine the layers feature with gradients and alpha channels, you can create some useful stencil based images. For example you can do things like this:
If you click on the above image you can download a zip file containing the various layer images which you can then study to see how they were created and how they merge together to create the final composite image.
Each object has its own layer so it can be moved independently of the other objects. Also, you can re-use any of the layers in any other project using any image editor because they are just RGBA PNG files.
The text objects use a linear gradient (or flat black for the shadow) as the RGB image channel. The text stencil is created by using an alpha channel and pasting some text onto it.